3D Modeling Techniques
|
|
This project was an introduction to using more complex geometry such as splines and compound geometry, in addition to modifiers including lathe, twist, and loft. I started with the nut and bolt modeling first, which was animated to show the entire model. The easiest model of the four was the nut and bolt because of how simple the shapes were, especially with having worked with simple box modeling before, as well has how uncomplicated the twist modifier was compared to others, such as loft. The hardest part of this exercise for me was creating outlines of shapes with lines, because I had a lot of difficulty figuring out how they curve and how to control said curve. The pawn was the most difficult model because of this, and took longer than the others to complete. Learning how to create more complicated geometry than simple primitives through the use of modifiers and compound geometry was very interesting as well as useful because it loosens the constraints of working with primitive geometry and allows the modeler to create more complex models and objects. I do wish this lesson had gone more in depth on each of the different modifiers used, but otherwise I found this to be very informative and helpful as an exercise.
|

|
This was an exercise in creating different basic primitives, and placing them in a precise location. I was given exact instructions for this model, which I followed. Being able to follow directions for a design is an important skill because most work in modeling will be creating objects and characters that already have been established previously by a separate design team.
|
|
This was an exercise in animating that taught new skills such as moving an object along a path. In addition to this there was also the challenge of changing the framerate of an animation by changing the number of frames themselves. The tutorials provided were very helpful and I ran into no technical difficulties with this assignment.
|
|
|
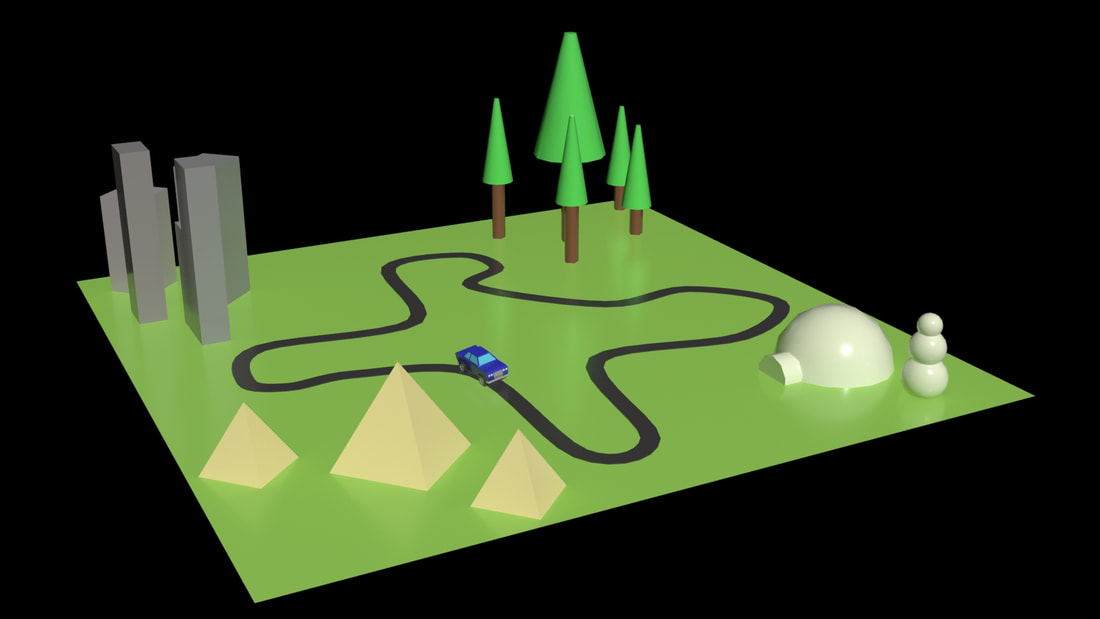
This activity built upon the previous two. in which it used the previous models and animated route. This exercise added both cameras and lights to create more immersive scenes and animations.
In this exercise I was instructed on how to set up and move different light sources to mimic a day/night cycle and the headlights of a car. I did this through changing the color and intensity of each light source throughout the scene while they moved. In addition to this I also created and link different kinds of cameras to the car to provide multiple perspectives of this animation. Through these I also learned more about how to attach targets to certain objects, such as the body of the car. |
Bitmap Graphics Techniques

|
This was an exercise introducing vignettes, where one image fades into another. While the lasso tool itself is a new tool in photoshop, this exercise also helped cement how to mask and resize objects in photoshop. This was accomplished through changing the feathering of the lasso tool so that the edges of the selected portion of the image faded a certain amount. After setting the feathering amount (15 px) I then masked the rest of the image. This creates the effect of the image fading into the background I had chosen.
|
|
This is an exercise in masking images. While I have had previous practice masking images, I did learn how to create shadows by changing the perspective and scale of black overlays and then applying Gaussian Blur and changing the opacity of the layer.
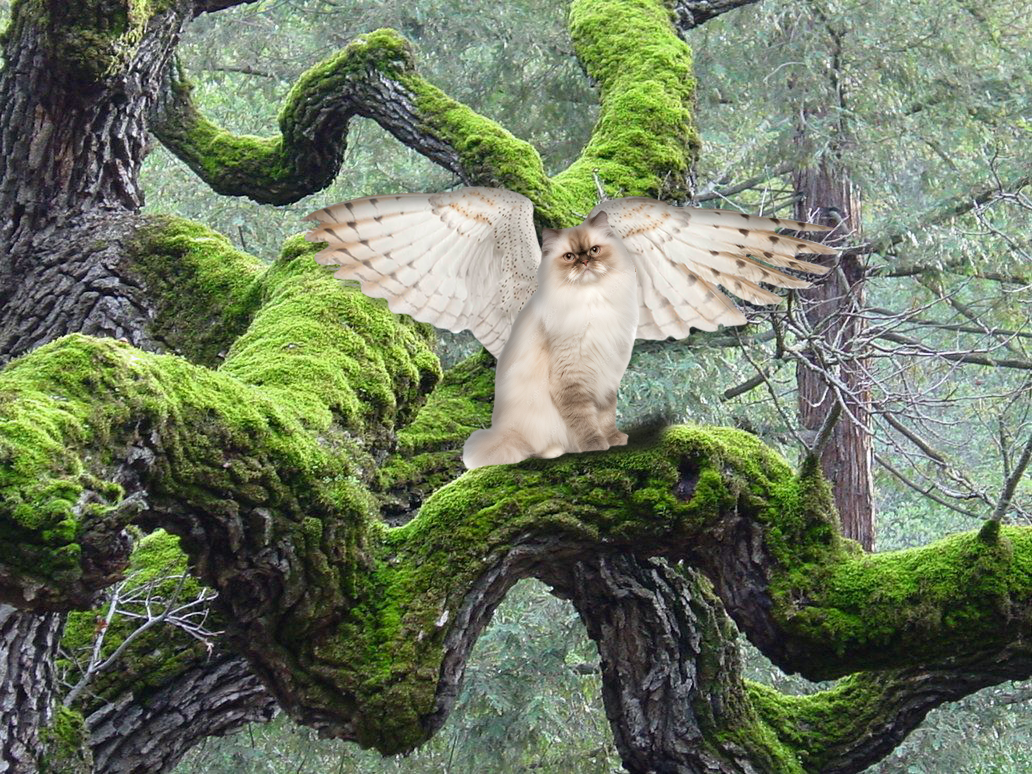
Owl Wings
https://www.sciencefocus.com/future-technology/owl-inspired-technology-may-reduce-noise-pollution Cat https://stock.adobe.com/search?k=himalayan+cat&asset_id=616706270 Tree Branch https://www.pinterest.com/pin/309833649334678080/ |
Rough Character Design
|
|
The first character is based on an angler fish, and their design reflects that not only in the stalks on their helmet but the theme of the deep sea. This is shown in the design of the diving suit, with the old diving bell, as well as the darker and more muted colors. This character is more restrained and gritty due to the harshness of the area they live in, and they mainly communicate through gestures.
The second character is based on the catfish, with the hood of their poncho mimicking the face of a catfish. Their clothes also reflect the habitat of the catfish, with a poncho and rainboots instead of a full diving suit, showing that the catfish lives in marshes and rivers. the muted brown colors of this character also add to this. The muted colors also help establish this character's more muted personality, with them being happy to live a sedentary lifestyle. The final character is based off of an eel, with the sleek design and pattern on this suit mimicking this. The brighter colors lend to helping show where this character live, that being a coral reef, which is also shown through the coral present on the character themselves. The bright colors of this character also allude to how they are more friendly and bubbly than the other two. |
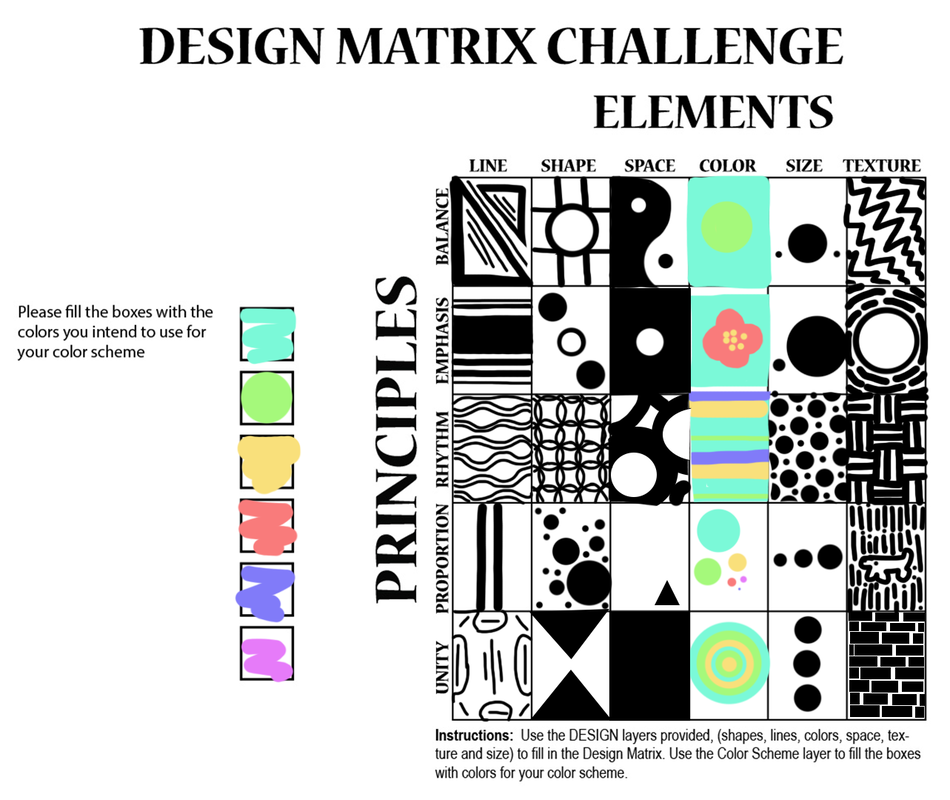
Design Matrix
|
This is a worksheet going through each of the design elements and principles are and how they relate to each other. For example, showing proportion by changing the size of something, or using thicker lines for emphasis. This assignment was somewhat difficult, because while the concepts around this worksheet are understandable, coming up with a unique example for each is more difficult, due to how many principles combine multiple elements. For example I have to use shapes to showcase the size of something, but the examples must be different for the separate categories. To help remedy this I stuck to a single shape when working with size so I could focus on the singular element..
|
Storyboarding

|
I enjoyed this storyboarding assignment because it allows me to create a setting and situation without having to focus on the minute details, and instead on the larger scene itself. Storyboarding is helpful when developing a character because you can state how the character reacts or thinks so that in a final project the personality of the character can shine through without explanation. For example, with my storyboard you can tell that the main character is athletic and clever, which can be built upon in the more detailed final project through things like more expressions or how they run and move.
|
Menu in Illustrator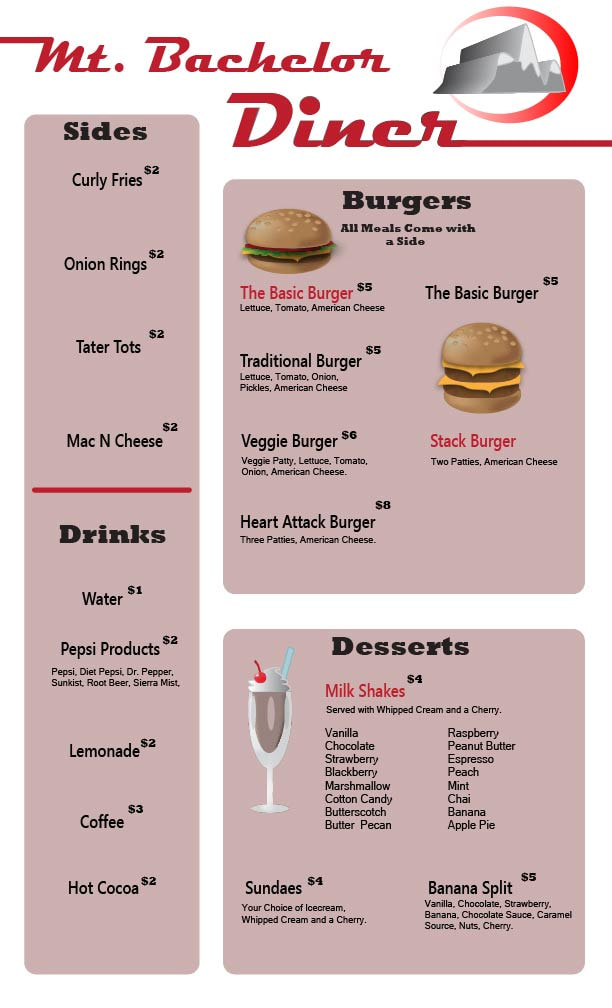
|
This assignment involved the use of multiple tools, including the shape builder, text, and pen tools. Additionally I was given instruction on how to use new tools, which were the mesh tool and gradient tool, as well as how to create and use symbols. I also experimented with and use two other tools, the width tool and blend tool to create the logo.
I used red and white as the main colors for my menu because they are often the color schemes of old diners, which my menu was inspired by. I used a more artistic font, Magneto Bold for the name of the restaurant for a bigger effect, and then used simpler fonts that were a mix of serif and sans serif depending on how large the text was. I had a lot of fun making this, between making the burgers and milkshake and creating a menu to put them on. |
